Blog
How to Create Beautiful Bokeh with Your Camera
How to Create Beautiful Bokeh with Your Camera
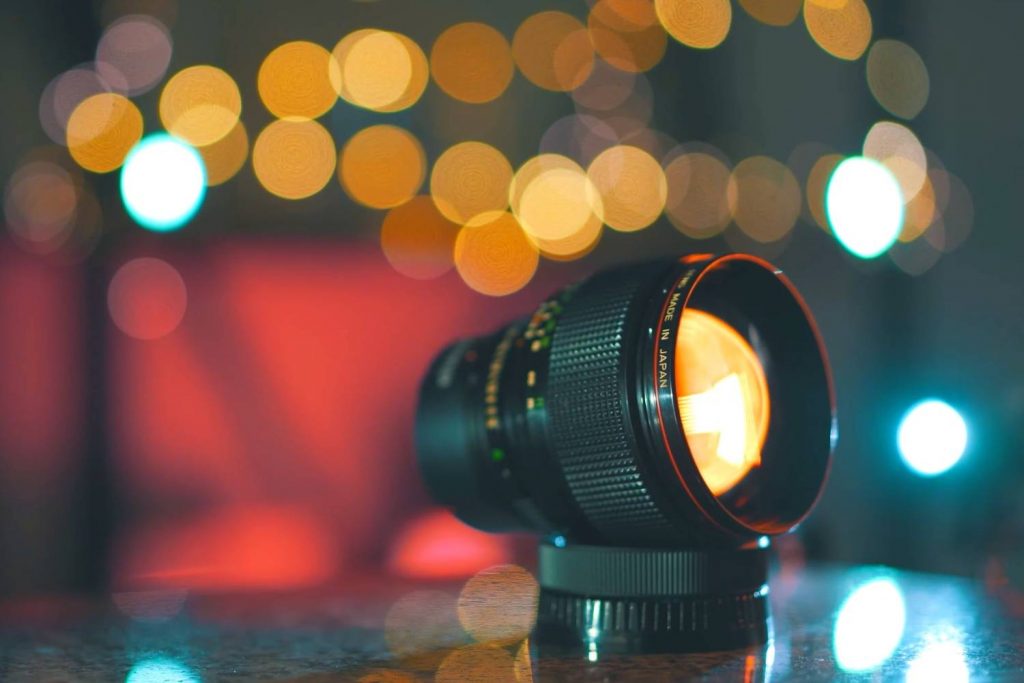
Bokeh, derived from the Japanese word “boke,” meaning “blur” or “haze,” refers to the aesthetic quality of the blur produced in the out-of-focus parts of an image. This artistic effect transforms ordinary photos into visually stunning works by emphasizing a subject against a dreamy, soft background. Whether you’re a beginner or an experienced photographer, understanding how to achieve beautiful bokeh can enhance your creative vision and elevate your photography.
This guide explores the techniques, settings, and tools needed to create stunning bokeh effects with your camera.
What Is Bokeh?
Bokeh isn’t just about blurring the background; it’s about the way the light and shapes in the out-of-focus areas appear. High-quality bokeh typically exhibits smooth, creamy textures without harsh edges, making it pleasing to the eye.
Why Use Bokeh?
- Isolate the Subject: Bokeh draws attention to your subject by blurring distractions in the background.
- Enhance Aesthetic Appeal: Soft, circular light spots create a dreamy, ethereal quality.
- Highlight Details: It adds an artistic touch, especially in portraits, nature, and product photography.
Essential Gear for Creating Beautiful Bokeh
1. Use a Fast Lens
A lens with a wide maximum aperture (e.g., f/1.2, f/1.4, or f/2.8) is ideal for achieving shallow depth of field, which enhances bokeh. Prime lenses like a 50mm or 85mm f/1.8 are especially popular for their ability to create smooth, pleasing backgrounds.
2. Choose a Camera with a Large Sensor
Full-frame cameras provide a shallower depth of field compared to crop-sensor or micro four-thirds cameras, making it easier to create prominent bokeh.
3. Consider a Longer Focal Length
Telephoto lenses (e.g., 85mm, 135mm, or 200mm) compress the background and enhance the blur effect. Longer focal lengths paired with wide apertures make bokeh more pronounced.
 Camera Settings for Beautiful Bokeh
1. Open the Aperture
Set your aperture to the widest setting your lens allows (e.g., f/1.8 or f/2.8). This reduces depth of field and blurs the background.
2. Adjust Your Focal Length
Zoom in or use a longer lens to achieve stronger background compression. This increases the intensity of the bokeh effect.
3. Control the Distance
- Subject-to-Background Distance: Place your subject far from the background. The greater the distance, the more blurred and soft the background will appear.
- Camera-to-Subject Distance: Move closer to your subject to emphasize the bokeh effect.
4. Optimize Focus
Ensure the subject is sharply in focus, as the contrast between a sharp subject and a blurred background enhances the overall effect.
Lighting and Composition Tips
1. Look for Light Sources in the Background
Point light sources, such as fairy lights, streetlights, or sunlight filtering through trees, create stunning bokeh effects. When these lights are out of focus, they appear as soft, glowing orbs.
2. Frame with Intent
Compose your shot to include elements that will look beautiful when blurred, such as flowers, foliage, or reflections.
3. Use Foreground Elements
Adding out-of-focus elements in the foreground can create depth and frame your subject artistically.
Techniques for Creating Bokeh
1. Portrait Photography
- Use a prime lens like an 85mm f/1.8 for soft, blurred backgrounds.
- Position your subject several feet away from the background.
- Incorporate natural light for highlights that enhance the bokeh effect.
2. Macro Photography
- Focus closely on small subjects like flowers or insects.
- Use a macro lens with a wide aperture to create smooth, dreamy bokeh.
3. Night Photography
- Utilize city lights or street lamps as background elements.
- Shoot wide open (aperture) to turn light sources into glowing orbs.
4. Creative Patterns
Experiment with bokeh filters. These are shaped cutouts (hearts, stars, etc.) placed in front of your lens to give bokeh light a creative shape.
 Post-Processing Tips for Enhancing Bokeh
While achieving great bokeh is primarily done in-camera, post-processing can refine and enhance the effect.
1. Adjust Background Blur
Use editing software like Adobe Lightroom or Photoshop to slightly increase background blur without overdoing it.
2. Enhance Light Spots
Boost the highlights in the bokeh areas to make them more prominent.
3. Reduce Noise
In low-light situations, bokeh shots may introduce noise. Use noise reduction tools to maintain a clean, smooth background.
Common Bokeh Mistakes to Avoid
1. Using the Wrong Lens
Kit lenses with small maximum apertures (e.g., f/3.5-5.6) are less effective at producing bokeh. Invest in a fast lens for the best results.
2. Placing the Subject Too Close to the Background
This reduces the separation between subject and background, making the bokeh less pronounced.
3. Poor Focus
Ensure your subject is sharply focused. Even slight misfocus can ruin the intended effect.
4. Harsh Backgrounds
Avoid backgrounds with cluttered or unattractive elements, as they can distract from the bokeh effect.
Best Lenses for Bokeh
- Canon EF 50mm f/1.2L: A favorite among portrait photographers for its creamy bokeh.
- Nikon AF-S 85mm f/1.4G: Produces stunning, smooth backgrounds.
- Sony FE 135mm f/1.8 GM: Ideal for isolating subjects and creating artistic blur.
- Sigma 35mm f/1.4 DG HSM Art: Known for its versatility and beautiful bokeh.
- Fujifilm XF 56mm f/1.2 R: A great option for APS-C users seeking professional-quality bokeh.
Conclusion
Creating beautiful bokeh with your camera is a combination of using the right equipment, understanding camera settings, and composing your shots thoughtfully. Whether you’re capturing portraits, landscapes, or creative shots, bokeh adds a magical, artistic element that transforms ordinary scenes into visually compelling photographs. With practice and experimentation, you’ll master the techniques to achieve stunning results, making your images stand out with their dreamy and professional-quality backgrounds.


