Blog
How to Create Stunning Panoramic Photos with Your Camera
How to Create Stunning Panoramic Photos with Your Camera
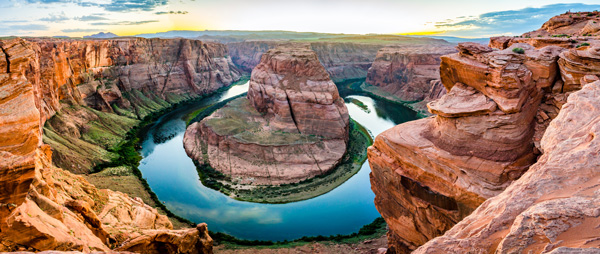
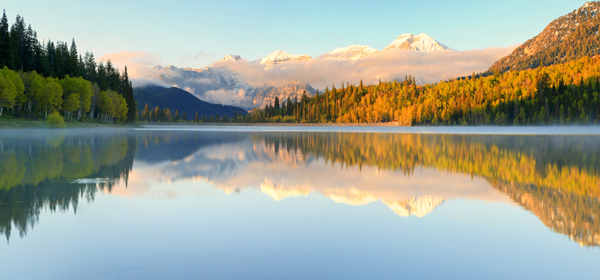
Panoramic photography allows you to capture wide, sweeping views that encapsulate expansive landscapes, cityscapes, or dramatic skies. By stitching multiple images together, you can create a single image that showcases the beauty and grandeur of your subject in much greater detail than a regular photograph. Whether you’re photographing mountains, coastlines, city streets, or architectural structures, panoramic photography offers a powerful way to capture the entire scene. Here’s how you can create stunning panoramic photos with your camera.
1. Understanding Panoramic Photography
A panoramic photo is essentially a photo taken from a series of images that are combined to form one wide, high-resolution image. The goal is to create a photo that feels as if it’s been “stretched out” to include more information and perspective than a standard photo. Panoramas can be horizontal (landscape) or vertical (portrait), and they often capture greater detail and depth of field.
2. Choosing the Right Equipment
To create a successful panoramic photo, you need the right camera and gear:
a. Camera
- DSLR or Mirrorless Camera: While you can create panoramic photos with a smartphone, using a dedicated camera (DSLR or mirrorless) will offer higher image quality, better control, and more flexibility. A camera with manual settings is essential, especially for adjusting exposure and focus across different frames.
- Lens: A wide-angle lens (e.g., 24mm or 35mm) is ideal for panoramic photography because it can capture a large portion of the scene in each frame. A longer focal length can work, but it might not capture the entire scene in one frame.
b. Tripod
A sturdy tripod is crucial for maintaining consistent framing, perspective, and alignment between the frames. Since panoramic photos require images to overlap perfectly, a stable camera is essential to avoid any distortion or blurring between frames.
c. Camera Settings
- Manual Mode: Use manual exposure settings (e.g., ISO, aperture, shutter speed) to maintain consistency across all frames.
- Manual Focus: Set your focus manually and lock it for each frame to ensure everything remains sharp throughout the panorama.
- Image Format: Shoot in RAW format if possible, as this will give you greater control over post-processing. RAW files retain more image data, allowing you to make significant adjustments in editing software.
3. Shooting Techniques for Panoramic Photos
Here are some shooting techniques to keep in mind when creating panoramic photos:
a. Overlap Frames
To make the stitching process easier, ensure that each frame you shoot overlaps with the previous frame by about 30-50%. This overlap provides enough information for the software to stitch the images seamlessly. It’s better to overlap too much than too little.
b. Level Your Camera
Using a tripod can help you maintain a level perspective across frames. Use the camera’s built-in level or a hot shoe spirit level to ensure that your camera remains level throughout the panorama.
c. Capture in Landscape Orientation
For panoramic photography, it’s generally better to shoot in landscape (horizontal) orientation rather than portrait (vertical). This orientation allows you to capture more width and depth in each frame.
d. Pan Consistently
As you move the camera, keep it steady and maintain a consistent pan speed. You want smooth, consistent movements between frames to avoid gaps and misalignments in the final panorama.
e. Focus and Exposure Control
Set your camera to manual focus and manual exposure to maintain consistent focus and exposure across all frames. Doing this helps prevent blurry parts or drastic shifts in brightness between frames.
4. Stitching Your Photos Together
Once you’ve taken your photos, the next step is to stitch them together to form a panoramic image. Here are some popular methods to do this:
a. Using Built-in Camera Features
Many cameras have built-in features for creating panoramas. Check your camera’s menu for options like “Auto Panorama” or “Panorama Mode”. These features will automatically stitch images together and give you a finished panoramic photo that you can tweak in post-processing if needed.
b. Photo Editing Software
If your camera doesn’t have built-in panorama stitching capabilities, or if you want more control over the process, you can use photo editing software:
- Adobe Lightroom or Photoshop: Both Lightroom and Photoshop offer powerful tools for creating panoramic images. You can manually align images, blend edges, and adjust exposure and color to create a high-quality panoramic photo.
- Microsoft ICE (Image Composite Editor): A free, easy-to-use tool that stitches photos together quickly and effectively. It’s perfect for those who want a basic panoramic image without spending money on software.
- Hugin (Open-source tool): Hugin is a more advanced tool with a lot of customization options. It’s perfect for those who want granular control over how their images are stitched together.
5. Editing Your Panoramic Photos
After stitching your images, you’ll likely need to do some post-processing to enhance your panoramic photo:
- Adjust Exposure and Color: Make sure the entire panorama is well-exposed, balanced, and has consistent colors. You might need to adjust brightness and contrast, white balance, or color temperature.
- Remove Distortion: Sometimes, panoramic photos can have curvature or distortion along the edges. Use the distortion correction tool in Lightroom, Photoshop, or other photo editing software to fix this.
- Crop and Straighten: Crop the edges if there are visible anomalies in stitching, or straighten the photo if the horizon appears uneven.
- Sharpen: Use sharpening tools to enhance fine details, especially if your panorama was shot at a high resolution.
6. Tips for Perfect Panoramas
- Shooting in good light: Early morning and late afternoon light can create stunning, dramatic scenes with long shadows and rich colors. Try to plan your shoot around these times.
- Focus on strong composition: Leading lines (e.g., roads, rivers, coastlines), contrasting elements (e.g., mountains against the sky), and the interplay between light and shadow can create powerful panoramas.
- Patience is key: Panoramic photography often requires careful planning, precision, and patience. It might take some time to get the hang of it, but the results are worth it.
7. Conclusion
Creating stunning panoramic photos with your camera requires careful planning, attention to detail, and good technique. By understanding how to frame your shots, choosing the right equipment, using consistent shooting techniques, and stitching your images properly, you can produce breathtaking images that capture the beauty of the scene before you. Whether it’s a sweeping view of mountains, a city skyline at dusk, or a tranquil landscape, panoramic photography offers a unique way to showcase your subjects with precision and clarity. So grab your camera, head out to explore, and capture the world around you!


